
White bread is a classic favorite. Making it at home is even better.
Imagine the smell of fresh bread filling your kitchen. A breadmaker can make this dream come true. This blog post will guide you to the best white bread recipe for your breadmaker. Whether you are a novice or experienced, this recipe is simple and rewarding.
Enjoy perfect, fluffy white bread every time. Let’s get baking!
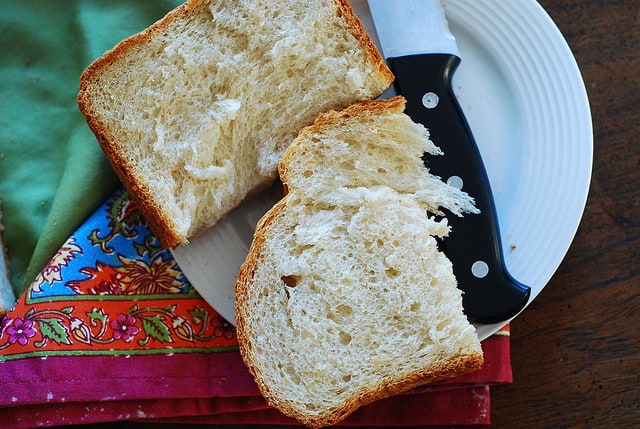
Credit: juliasalbum.com
Ingredients For White Bread
Creating the perfect white bread is a delightful experience. The key is using the right ingredients. This guide will walk you through essential components and optional add-ins. These will enhance flavor and texture.
Essential Ingredients
Start with all-purpose flour. It provides structure to the bread. Use warm water for activating yeast. It helps the dough rise. Sugar adds sweetness and aids fermentation. Salt balances flavor and strengthens gluten. Choose active dry yeast for reliable results. It initiates the rising process. Include butter for a richer taste. It also adds moisture to the loaf.
Optional Add-ins
Milk powder can make the bread softer. Honey adds natural sweetness and depth. Consider olive oil for a subtle flavor boost. Eggs improve texture and color. Add herbs for a savory touch. Garlic powder can introduce a bold flavor. Cheese makes bread more delightful. Nuts can provide crunch and variety.
Choosing The Right Flour
When making the perfect white bread in your breadmaker, choosing the right flour is crucial. The type of flour you use can significantly impact the texture, flavor, and rise of your bread. Let’s dive into the essential considerations to help you select the best flour for your recipe.
Bread Flour Vs All-purpose Flour
One of the first decisions you’ll face is whether to use bread flour or all-purpose flour. Bread flour has a higher protein content, which can help your bread rise higher and have a chewier texture. This makes it a popular choice for many bread recipes.
On the other hand, all-purpose flour is more versatile and can be used for a variety of baked goods. It has a lower protein content compared to bread flour, resulting in a softer and more tender crumb. If you prefer a lighter, fluffier white bread, all-purpose flour might be the way to go.
Personally, I’ve tried both flours in my breadmaker. I found that bread flour gave my loaves a delightful chewiness that was perfect for sandwiches. However, when I used all-purpose flour, the bread was softer and excellent for toast. Your choice will ultimately depend on the texture you enjoy most.
Why Protein Content Matters
The protein content in flour plays a significant role in bread making. Higher protein flours, like bread flour, contain more gluten. Gluten helps trap air bubbles during the kneading and rising process, giving bread its structure and chew.
Conversely, flours with lower protein content, like all-purpose flour, have less gluten. This results in a finer crumb and a softer texture. While it might not rise as high as bread made with bread flour, it can still produce a delicious loaf.
Consider what type of bread you enjoy. Do you like a hearty, chewy texture, or do you prefer a light, airy loaf? Experimenting with different flours can help you discover your ideal bread texture.
Have you ever tried mixing the two flours? Combining bread flour with all-purpose flour can give you a balance of chewiness and tenderness. It’s a great way to customize your bread to your liking.
Choosing the right flour is a key step in making the best white bread in your breadmaker. Whether you opt for bread flour or all-purpose flour, understanding how each affects your bread will help you achieve the perfect loaf every time.
Preparing The Breadmaker
Start by gathering all ingredients for the best breadmaker white bread recipe. Ensure the breadmaker is clean and ready to use. Follow the recipe step-by-step for delicious, homemade white bread.
Preparing the breadmaker is a crucial step in achieving the perfect loaf of white bread. Before you even think about ingredients, your breadmaker needs to be ready to work its magic. This preparation not only ensures the longevity of your appliance but also guarantees the best possible results for your bread.Cleaning And Maintenance
First things first, ensure your breadmaker is sparkling clean. Residue from previous baking sessions can affect the flavor and texture of your bread. Unplug the machine and remove any removable parts. Wipe them with a damp cloth and mild detergent. Make sure to dry everything thoroughly before reassembling. Regular maintenance can prevent unexpected hiccups. Check for any loose parts or wear and tear. Is the kneading blade secure? These small checks can save you from mid-bake surprises.Proper Placement
Where you place your breadmaker can actually impact your baking success. Consider setting it on a stable, flat surface to prevent vibrations during kneading. Avoid placing it near heat sources or direct sunlight as these can interfere with temperature settings. Have you ever had bread that didn’t rise properly? It might be due to improper placement. Allow some space around the breadmaker for proper air circulation. This helps maintain an even temperature, crucial for that perfect crust. By taking a moment to set your breadmaker right, you’re paving the way for a delicious loaf. Wouldn’t you want every slice to be just right?Measuring Ingredients
Accurate ingredient measurement is crucial for the best breadmaker white bread. Precise quantities ensure balanced flavor and perfect texture. Follow the recipe closely for delightful results.
Measuring ingredients is a crucial step in crafting the perfect white bread using a breadmaker. The balance of ingredients determines the texture, taste, and rise of your loaf. Even slight variations can lead to drastically different results. Have you ever wondered why your bread sometimes comes out denser than expected? The secret often lies in how you measure your ingredients.Accurate Measurements
Accuracy is key when making bread. Using precise measurements ensures consistency in your baking results. A cup of flour sifted can weigh significantly less than a cup of unsifted flour. This discrepancy can affect the dough’s moisture content and texture. Consider using a measuring cup specifically designed for dry ingredients for flour. Liquid measuring cups for water and milk can help you avoid misjudging volumes. Remember, even a tablespoon more or less can change the outcome of your loaf.Using A Kitchen Scale
For the best results, consider using a kitchen scale. Weighing your ingredients offers the highest level of precision. It removes the guesswork from measuring by volume, which can vary based on how ingredients are packed. For instance, one cup of flour should weigh approximately 120 grams. When you weigh ingredients, you ensure that each bake is consistent. This method is especially beneficial for beginners who are still mastering the art of bread making. Investing in a kitchen scale can seem unnecessary at first, but it often pays off with superior bread quality. Plus, it can be used for other culinary endeavors, making it a versatile tool in your kitchen. Incorporating these accurate measuring techniques can transform your bread-making experience. Have you tried using a kitchen scale before? If not, it might just be the game-changer you need for that perfect loaf every time.Mixing And Kneading
Creating the perfect white bread starts with mixing and kneading. This process is crucial for texture and flavor. A breadmaker simplifies these steps, ensuring consistency. Proper mixing blends ingredients evenly. Kneading develops gluten, giving bread its structure.
Breadmaker Settings
Modern breadmakers have preset settings. These settings control mixing and kneading. Select the white bread setting for best results. This setting adjusts timing and speed. It ensures dough reaches the right consistency.
Each breadmaker model may vary. Check your manual for specific instructions. Experiment with settings for personal preferences. Remember, settings impact final bread quality.
Kneading Techniques
Kneading is vital for dough elasticity. A breadmaker handles this effortlessly. It mimics hand-kneading through rotating paddles. These paddles push and fold the dough. This technique strengthens the dough.
Watch the dough during kneading. It should be smooth and elastic. If too sticky, add a bit more flour. If too dry, add a splash of water. Adjust until the dough feels right.
:max_bytes(150000):strip_icc()/best-bread-machine-bread-photo-by-LMR721-5506039-cropped-444fae54f9e742b4b8080aead10faf3b.jpg)
Credit: www.allrecipes.com
Rising And Proofing
Let the dough rise until it doubles in size, ensuring soft and fluffy white bread. Proper proofing guarantees a perfect texture.
Rising and proofing are the heart of bread-making magic, especially when crafting the perfect white bread in your breadmaker. This stage determines the texture and flavor of your bread. It’s where the yeast works its charm, and your dough transforms from a simple mix to a fluffy masterpiece. Curious about how to optimize this crucial phase? Let’s dive deeper!Ideal Temperature
Temperature matters more than you might think. Your kitchen’s climate can dictate the dough’s rise. Aim for a warm environment, around 75-80°F, to keep the yeast happy. Ever wondered why your bread sometimes doesn’t rise well? It could be too chilly in the room. Consider creating a cozy spot near a window or a lightly heated oven.Timing Tips
Timing is the breadmaker’s secret weapon. The dough needs its beauty sleep to rise properly. Typically, white bread requires about 1 to 1.5 hours for the first rise. But what if you’re in a rush? You might be tempted to cut corners. Resist the urge—your bread will thank you with a better texture. Remember, patience is key. Have you ever found yourself peeking at the dough too soon? Trust the process and let the yeast do its thing. — Embrace the art of rising and proofing, and you’ll find your white bread turning out better than ever! How do you ensure the perfect rise in your bread-making adventures? Share your tips and tricks in the comments!Baking The Bread
Discover the perfect white bread recipe for your breadmaker. Simple ingredients create fluffy, light bread that everyone loves. Enjoy fresh, homemade bread with minimal effort.
Baking the perfect loaf of white bread in a breadmaker can feel like a small triumph in your kitchen adventures. The aroma of freshly baked bread is a reward in itself, filling your home with a warm, inviting scent. But to achieve that golden, fluffy loaf, understanding the baking phase is crucial. Let’s dive into the details that will transform your bread-making experience. ###Choosing The Crust Setting
The crust setting on your breadmaker isn’t just a button; it’s your ticket to personalized bread perfection. Do you prefer a lightly golden, soft crust that melts in your mouth? Or perhaps you lean towards a darker, crunchier crust that adds a satisfying bite? Experimenting with the crust settings can be enlightening. If you’re unsure, start with a medium setting to get a balanced texture. Adjusting this simple setting can make your homemade loaf rival any bakery’s offering. ###Monitoring Baking Progress
Watching your bread bake might not be as thrilling as a nail-biting movie, but it holds its own kind of magic. Peeking through the breadmaker’s window, you can witness the dough’s transformation into a beautiful loaf. Keep an eye on the color of the crust as it develops. Is it turning too dark too quickly? You might need to adjust the temperature or the baking time. Such observations can be the difference between a loaf that’s just okay and one that’s simply unforgettable. Also, take note of the smell. A slightly burnt smell might mean your bread is overbaking. Trust your senses—they’re invaluable tools in the kitchen. Engaging with your breadmaking process can lead to delightful discoveries and improvements. Have you ever noticed how small tweaks can lead to significant changes? Embrace the process, and you’ll find baking bread is not just about the end result but the journey itself.:max_bytes(150000):strip_icc()/AR-6813-white-bread-for-the-bread-machine-ddmfs-4x3-hero-6d9dde1ebd1249a5bd0cf773a6c84a16.jpg)
Credit: www.allrecipes.com
Cooling And Slicing
Let the bread cool completely before slicing. This ensures even slices without crumbling. Enjoy perfectly cut pieces every time.
Cooling and slicing are critical steps in achieving perfect white bread from your breadmaker. After the delightful aroma fills your kitchen, it’s tempting to cut into the loaf immediately. But patience is key. Cooling and slicing properly ensures your bread maintains its texture and flavor. Here’s how you can master these final steps for an irresistible loaf.Proper Cooling Techniques
Allowing your bread to cool completely is essential. As you remove the loaf from the breadmaker, place it on a wire rack. This prevents the bottom from becoming soggy. Have you ever noticed your bread collapsing after cutting it too soon? Letting it cool for at least 30 minutes helps maintain its shape. The starches in the bread set during cooling, giving you a firm, sliceable loaf. Avoid placing your bread in direct sunlight or near a heat source. Rapid cooling can alter the texture, making it less enjoyable. Find a cool, dry spot in your kitchen for the best results.Best Practices For Slicing
Slicing your bread can be an art form. Use a sharp serrated knife to achieve clean cuts. A dull knife might crush the loaf, compromising its structure. Consider the thickness of your slices. Thin slices are perfect for sandwiches, while thicker ones are great for toast. Think about what you’ll be using the bread for before you start slicing. Do you want your bread to stay fresh longer? Slice only what you need. Keeping the loaf intact as much as possible preserves its freshness, extending its shelf life. By focusing on cooling and slicing, you ensure every bite of your homemade white bread is as delicious as it can be. How will these simple techniques transform your bread-making experience?Storing White Bread
Keep white bread fresh by storing it in a cool, dry place. Use airtight bags or containers to prevent staleness. This keeps your homemade breadmaker white bread recipe delicious and soft for longer.
Storing freshly baked white bread can be as satisfying as the baking process itself. You’ve put in the time to make that perfect loaf, so it’s important to store it properly to maintain its flavor and texture. Whether you plan to enjoy your bread in a couple of days or save it for later, proper storage ensures that every slice remains as delicious as the first. Let’s explore some practical methods to store your homemade white bread.Short-term Storage
For short-term storage, keep your bread at room temperature. Use a bread box or a paper bag to allow for slight air circulation, preventing moisture buildup. Storing bread in plastic can lead to mold, so it’s best to avoid it unless you’re sealing it for freezing. If you don’t have a bread box, a clean tea towel can also do the trick. Wrap your bread loosely to maintain its crusty exterior. Check your bread daily to ensure it’s still fresh and ready to enjoy. Consider this: have you ever noticed how freshly baked bread disappears quickly? Keeping it at room temperature is perfect if you plan to consume it within a few days.Freezing For Longer Shelf Life
Freezing bread is an excellent option for extending its shelf life. Allow your bread to cool completely before freezing to prevent ice crystals from forming. Slice your bread before freezing to make it easier to grab just what you need later. Use freezer bags or airtight containers to prevent freezer burn. Be sure to label the bag with the date so you know how long it’s been in storage. Bread can typically be stored in the freezer for up to three months. When you’re ready to enjoy your frozen bread, simply take out the slices you need and let them thaw at room temperature. For a quick fix, pop them directly into the toaster. You’ll be amazed at how fresh it tastes even after weeks of storage. Have you tried both methods? Which one do you find keeps your bread tasting best? Your experiences can help refine the perfect storage technique for homemade white bread.Troubleshooting Common Issues
Baking bread can be a delightful experience. But sometimes, issues arise that can frustrate even the most seasoned bakers. Understanding these common problems can help you achieve perfect white bread every time. Let’s explore some troubleshooting tips to enhance your bread-making journey.
Dense Bread
Dense bread is a common issue for many bakers. This often occurs when the dough doesn’t rise properly. Ensure you’re using fresh yeast. Expired yeast can lose its potency. Also, check the water temperature. It should be warm, not hot. Hot water can kill yeast, preventing the dough from rising. Another tip is to measure ingredients accurately. Too much flour can make the dough heavy.
Uneven Baking
Uneven baking can lead to bread that is overcooked in some areas and undercooked in others. This often happens when the breadmaker’s settings aren’t optimized. Ensure you’re selecting the right size and crust settings. Always preheat your breadmaker if your model requires it. This ensures even heat distribution. Also, place your breadmaker on a flat, stable surface. A tilted machine can bake unevenly.
Frequently Asked Questions
What Flour Is Best For White Bread?
Bread flour is best for white bread. It has a high protein content, which creates a chewy texture and good rise.
Is It Cheaper To Buy Bread Or Make It In A Bread Machine?
Making bread in a bread machine is usually cheaper than buying it. You save on ingredients and avoid preservatives.
Why Is My Breadmaker Bread So Dense And Heavy?
Dense bread may result from too much flour, insufficient yeast, or improper kneading. Ensure accurate measurements and use fresh ingredients. Check dough consistency; it should be sticky but not too wet. Proper kneading and rising time are crucial for light, airy bread.
Adjust settings based on your breadmaker’s instructions.
What Is One Drawback Of Using A Bread Machine?
One drawback of using a bread machine is its limited capacity. It can only make small loaves, which may not be sufficient for large families.
Conclusion
Enjoy fresh white bread with your breadmaker. It’s simple and rewarding. Your kitchen fills with the delightful aroma of baking bread. Each slice offers soft, fluffy goodness. Perfect for sandwiches or a warm, buttery treat. Remember to use fresh ingredients for the best taste.
Experiment with different settings to find your ideal texture. Baking bread at home saves money and gives satisfaction. Share your homemade bread with loved ones. Make every meal special with this easy recipe. Your breadmaker is your ally in creating delicious bread.
Enjoy every bite!