One of the most vital parts of any kitchen these days is a blender. It is perfect for grinding spices and powder to make delectable cuisine. Furthermore, it is also an excellent option for making drinks. One of the best brands to make this device is Kitchenaid. Moreover, the most critical component of it is its coupler.
It’s essential to maintain the coupler of blenders routinely. Doing so will ensure that it has more longevity and perform more effectively and consistently. Knowing how to replace Kitchenaid blender coupler will go a long way to save you from unnecessary expenses.
So, without further ado, let’s get right down to it and look into the process.
What Is a Blender Coupler?
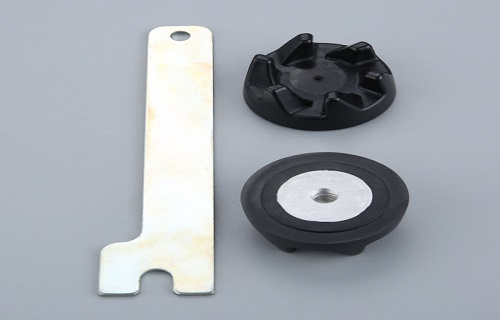
A blender coupler can essentially be considered as the powerhouse of the device. It helps transform electricity into mechanical energy and transfer it to the central mixing part of the tool.
The component can be divided into two parts; a motor for generating power and blades for grinding food. This piece protects the item from friction and stress.

Typically, a blender coupler tends to be very sturdy and durable. It is specifically made to be tough enough to crush any food. However, it is only natural that the blades will start wearing off after a while.
The best way to find out if it’s at the end of its rope is by checking the noisiness during operation. Despite being one of the most premium options, the Kitchenaid Blender Coupler also falls under it.
How to Replace Kitchenaid Blender Coupler
Today, we will be discussing two effective methods that will allow you to make a quick and effective replacement of your Kitchenaid blender coupler. Both processes are incredibly simplistic, and you will need things that are common in almost all households.
Orthodox Process
Here’s the orthodox process detailed for you.
-
Step 1: Disconnecting the Coupler
Like every other model, you will find the coupler of the Kitchenaid blender coupler on top of the motor. The component is typically made of aluminum to prevent overloads and easy removal.
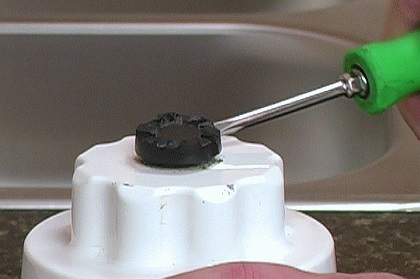
Take a screwdriver and jam it into the gap between the coupler and motor. Once it is snugly inside, start to lift the tool slowly while rotating it.

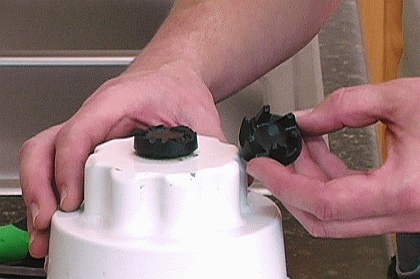
Couplers are quite tightly fit to the motor to prevent it from flying off the device when operational. So you might need to give it a few twists with the screwdriver to loosen it. The threads within the coupling will come off gradually. Soon enough, the piece will just come off automatically.
-
Step 2: Preparing the Spindle of the Blender Motor
If you use the blender for a long time, it is natural that the motor spindle will be dirty from prolonged use. Therefore, you will need to clean it before you can install a replacement. Furthermore, a lot of threads from the previously removed coupler will still be around on it. Therefore, accurate and minute inspection is necessary.

Take the screwdriver and start gently brushing on the spindle. It will begin to slowly scrape away any excess threads left by the previous coupler. Keep on brushing until it is as spotless as possible. Finally, use a cloth to remove any grime off of it.
-
Step 3: Attaching the Replacement Coupler
Now that your motor is nice and shiny, it’s time to connect the new coupler to it. Use an ample amount of threads when attaching it to the device. That way, it will be able to utilize the full potential of its strength. Once you start using the blender again, the thread will tighten into the tool.

When doing this process, the final thing to remember is that the spindle is threaded in a reverse fashion. Therefore, you will need to screw the coupler in a counter-clockwise pattern. Otherwise, it will not fit into the blender properly or work.
Alternative Method
Let’s discuss the alternative method;
-
Step 1: Placing the Screwdrive
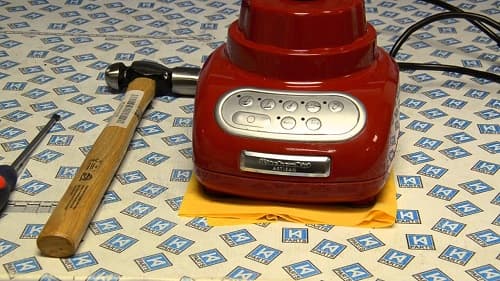
Unlike the previous method, this process actually accomplishes the task faster. However, it also requires a little bit more technique for it to work smoothly. First of all, you will need to get a flathead screwdriver. Next, place it on the left side of the coupling’s teeth. Doing so will allow it to remove the piece in a clockwise fashion.

-
Step 2: Beating with a Hammer
Once your screwdriver is in place, you will need to take a hammer with proper grip. Start striking the tool in the direction similar to which the spindle rotates. You will need to put in a couple of swift and decisive strikes. This action will get the spindle moving at a fast speed.

Keep on striking the hammer against the screwdriver until the spindle starts to rotate as fast as possible. Once it achieves enough velocity, the positioning of the screwdriver will cause the coupler to fly off. It will occur quite efficiently as the spindle will not be able to keep up with it.
-
Step 3: Connecting the Coupler
This step is similar to that of the first one. Just be sure to make sure no threads are on the spindle when putting it inside. Lastly, make sure to keep the motion accurate when fitting the component. Your replacement will be complete just like that!

Also Read:
Conclusion
Learning how to replace Kitchenaid blender coupler is a valuable skill to have. It’s efficient for taking care of such an essential household appliance in an instant. You won’t have to worry about hiring a handyman or a mechanic for this device ever again and save you on many additional expenses.
A lot of homeowners often panic when their Kitchenaid blender coupler stops working. They usually take the drastic decision of buying an entirely new product.
However, now that you know about this process, you will spare yourself from this exorbitant expenditure. Fixing it will never seem like a hassle ever again! You can use it continuously for as long as you want and never have to worry about what to do if it underperforms.

